
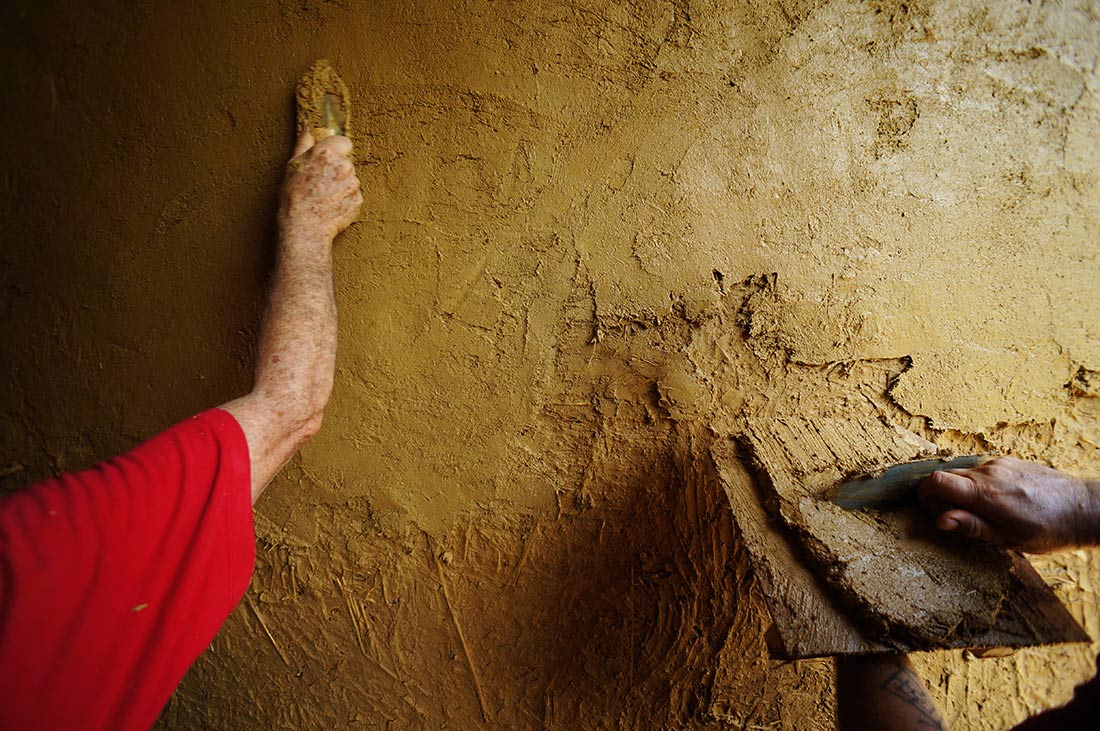

A student floats a creamy layer of clay plaster during one of our workshops
In my recent series of posts, I’ve described the process for building and finishing a light clay straw wall. First there was mixing the light clay straw itself and stuffing it into wall cavities. Then I discussed how to prepare for plaster by making and installing wood trim, and coating the walls with a simple clay slip. Next I’ll describe how to make and apply a base coat (or scratch coat) clay plaster. Now it’s really getting fun.
What is Base Coat Clay Plaster?
The base coat is your thickest layer of plaster, the first true plaster layer to go up on the wall. (I’m referring to either a light clay straw or straw bale wall for the purposes of this how-to.) The primary purpose of the base coat is to begin to correct the wall and create a strong base. This is your opportunity to start to fix any unevenness or undulations in your wall plane. When all is said and done, you should have a relatively flat surface ready to receive your second coat, or evening coat of plaster. (Or your finish coat, if you’re only doing two coats.)
Let me specify here that, just like anything, there are many ways to go about this business of plastering and finishing your walls. Feel free to experiment. This is just one possible route of action. This scratch coat process is simple and quite strong with the addition of a not-so natural building material, but we’ll get to that in a minute, ya?

A bucket of mud… clay plaster for base coat.
Base Coat Clay Plaster Recipe
This is my preferred base coat clay plaster recipe for the purposes of plastering a light clay straw wall. It’s rich in clay, so it’s easy to use and manipulate. (Note: this recipe works just as well on straw bale walls too.)
- 1 part clay (screened through 1/4″ hardware cloth)
- 1 part sand (with particles no bigger than 1/4″)
- 1-2 parts Chopped straw (ideally 1-2″ in length)
You’ll end up needing a fair amount of clay plaster, so my preference is to keep the processing time down whenever possible. The clay should be screened through an 1/4″ hardware cloth to remove large particles. Keep it extra wet and that step will go more quickly. (Or if you’re blessed to have a dry pile of clay, even better! Dry clay is much cleaner to work with.)
The straw can be made with a variety of methods (here’s one simple way to make chopped straw), and in my experience it doesn’t necessarily need to be screened. Longer lengths of up to 3-4″ are okay to worth with, though 2″ max is much nicer, especially for thinner coats. This plaster coat should be quite straw-rich, between 1-2 parts per mix — it will greatly enhance the strength of the mix.
The plaster can be prepped and fully mixed in advance of the time when it will be used. Keep it covered in buckets or other appropriate containers. Note that if it sits too long, it will start to ferment (hence the sour smell), which is actually customary in some plastering traditions.

Smoothing out base coat clay plaster with a Japanese “jigane” trowel
Applying the Base Coat
Now for the fun part — applying the plaster to the light clay straw wall. As always, you want to moisten your wall to receive the base coat of clay plaster. You can actually follow up the clay slip immediately with the base coat. But if the slip has dried out, spray it down fairly heavily in order to create some suction for the plaster. (This trombone sprayer is handy for that.) Suction is critical here! You don’t want your plaster to fail because your wall was not properly wetted.
Your thickness of application may vary, but I aimed for a good 3/8″ on the outhouse walls. (I sized my trim with rabbets accordingly.) 3/8″ is not terribly thick, so it doesn’t allow for the easy correction of big undulations in the wall… but hey, you shouldn’t have much of that, right 😉 ? You can continue to refine the shape with your second leveling coat of clay plaster.
As I write this, I’m realizing I should eventually do an entire post just on trowel use, but honestly it’s difficult enough to master the trowel, never mind try to write about it intelligently. My best advice is this — work with someone experienced, watch some videos, play around. Minimum tools include a hawk, an application trowel, and a wood or steel float. That’s a whole other subject for now. Maybe my next post?
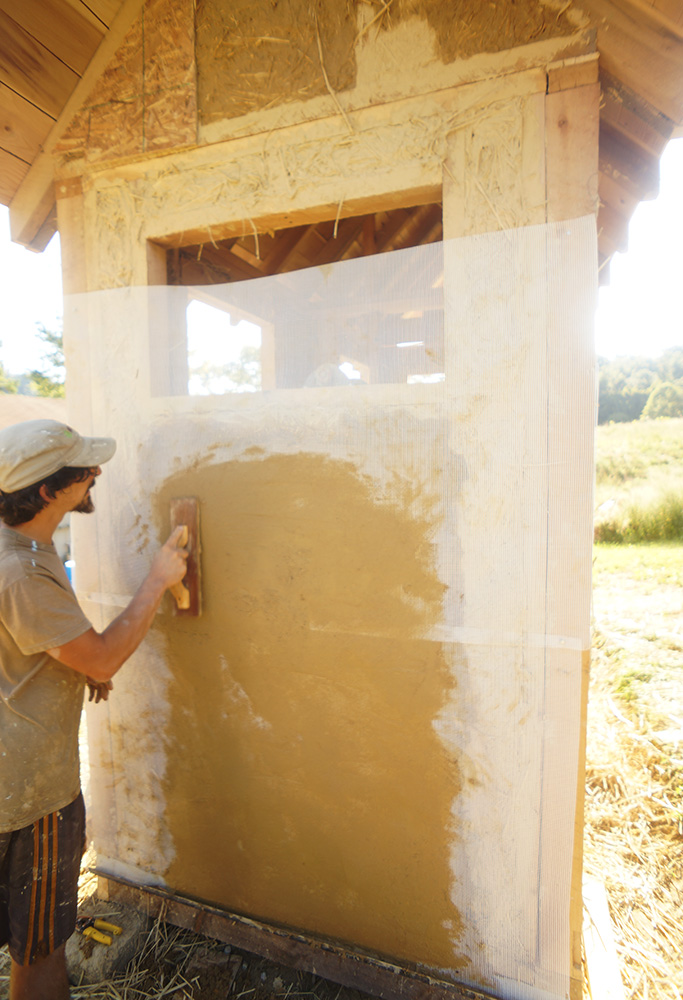
Floating fiberglass mesh in clay plaster with a wood float — watch it disappear!
Floating Fiberglass Mesh in Clay Plaster
What’s more important to cover right now is this — you need to account for bridging (that is the need to span two unlike materials) in a light clay straw wall. If you plaster over the straw and exposed wood studs without any extra considerations, your plaster may eventually delaminate and fail. No one wants that. It may be not tomorrow, or next week, but it is likely to happen at some point. That’s because wood and clay move at different rates throughout the seasons.
Most books will recommend that you cut burlap strips and staple them to the studs before you plaster. That is definitely an acceptable (and tedious) solution. However, I would like to propose an alternative that James Henderson turned me on to.
That alternative is fiberglass mesh. Yes, it’s not a natural product, but it does such a good job that it is worth considering — it is super strong and easy to use. If you’re working solo, you’ll end up saving a lot of time with the mesh. It’s hard to get me jazzed about a lot of manufactured building products, but this is one really worth thinking about incorporating into your work.
The beauty of the mesh is that you can float it directly into a freshly plastered wall. No stapling over individual studs here. Cut a strip to length and compress it directly into the wall with a float or trowel. Viola.
Think of the mesh as a continuous sheet of fiber. The effect is that it provides a huge amount of stability to the clay plaster, preventing any possibility of delamination as your structure moves in tiny ways over time, and your plaster absorbs and releases moisture during the life of the building.
Here’s a video of fiberglass mesh getting floated into clay plaster. Unfortuntely, I had a couple of better videos illustrating this process but my camera card got corrupted and they went bye-bye. Oops.
The only real trick to using the mesh is this — don’t wait terribly long once your wall section has been plastered. You need the plaster to be wet to be able to float it in. Get your wall as flat as you want it to be first and then bury this stuff just under the surface.
The Art of Plastering
Without a doubt, plastering is an important natural building skill to be learned and honed over time. The act of putting clay or lime on a wall is simple in theory, but a rewarding challenge in real life. In a future post, I’ll describe an extremely simple project that you can do to be able to practice plastering without having an actual building to work on.
Finally, base coat plaster is just as important as the finish layer. I always try to stress this basic fact to people — the quality and appearance of your finish is greatly impacted by the quality of your base coat. If your base coat is poorly applied (lumpy, uneven, ugly) there’s no “making up” for it in your finish. Commit to that reality and you will do your best work in applying your base and throughout the entire process of construction.
Godspeed, mud slingers.

Base coat clay plaster under the eaves of our outhouse. Notice fairly clean lines at the trim.
uh … I assume some quantity of water needs to be added to that plaster recipe, but there’s no mention of it. What do you recommend?
Enough water so that the plaster spreads without too much effort, but not so much that it doesn’t have enough body. It’s not really quantifiable.