I’ve been excited about building a timber frame outdoor kitchen since we moved to this land in 2015. It’s taken until this summer to get started but for good reason(s). The scope of the project has evolved to include a patio with dry stone retaining walls, which will be a vast improvement from the previously uneven slope that unceremoniously terminated at the back of the house porch.
Our 2019 Timber Frame Workshop brought the 10×16 outdoor kitchen frame to completion in 7 days. We had 15 participants from across the country — Maryland, Oregon, Washington, Alabama, Tennessee, Ohio, and more… Here’s a glimpse at our first few days together working on the small oak timber frame.
Timber Frame Workshop 2019 Recap
The 10×16 outdoor kitchen sits immediately next to our existing house in a graded area surrounded by what will eventually be dry stone retaining walls. This year, I took the extra time and effort to do something I’ve been wanting to do for a long time — in advance of the class, I scribed the posts to a stone plinth foundation. This will have to be a separate post, but the idea is that the wood is cut to match the profile of the rough stone, resulting in a beautiful finished look. I demonstrated the process to our class on a sample piece of wood.
Most of the timbers were previously planed, but we had a couple of 20′ long beams and a few miscellaneous timbers that needed surfacing. Blain and Fred stepped in with electric planers roaring to prep these pieces for layout. Getting the timbers planed before layout makes marking lines much easier, plus the wood is that much closer to its finished appearance.
Layout Using Square Rule
This year, our selection of timber was much more square than previous batches. (Thus the importance of having a good relationship with your sawmill!) We spent the first full day going over square rule layout and how to assess a piece of timber, use a square and tape measure, and put accurate, legible lines on the wood. This day is always a bit of a deep dive, especially for beginners. Everyone pulled through in the end.
Cutting with Hand Tools
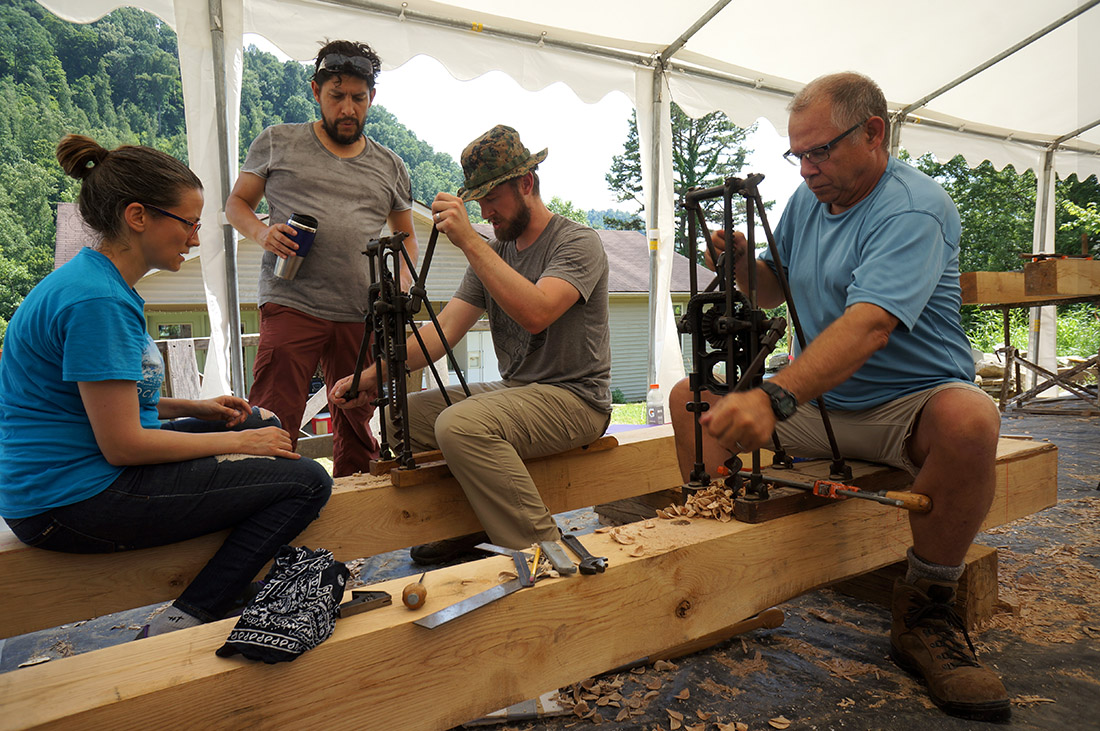
Everyone’s favorite part of timber framing is getting some hands on the tools, of course. There’s never any problem finding a happy volunteer to bore mortises with the boring machine, and soon everyone is chiseling and sawing away on the various joints.
Participants got their chops on the plate step lap joints and braces, and then we moved on to mortises, post tenons, and the wedged half dovetail, the most complex joint in the small structure.
I’m always amazed and thankful for everyone’s positivity and teamwork. This group found their groove relatively quickly and it was apparent how motivated people were to see this little timber frame go up by the end of the week. More to come!


Sweet! So sorry I missed that one. Probably couldn’t have made it anyway cause I’m in the middle of building my own cottage. But looks like a lot of fun and look forward to seeing more pictures.
Dana, maybe next time! Good luck with your cottage and hope to see you in 2020.
I’ve been enjoying some of these photos on Instagram and still hope to attend one of your workshops in the future. Congrats to all of the participants on an incredibly successful week of building and growing. Great job! 💪❤🙌
Thanks, and definitely hope you can make it out next year! We’ve got a couple of things brewing here.
Ziggy! Thanks for creating the space for this amazing opportunity. It helped ignite a deeper passion for this craft. I can’t wait to get started on my own project. The knowledge and experience gained during this workshop is priceless. I hope to attend more of your workshops in the future.
I wish You, April and little Hazel the very best.